> ## Documentation Index
> Fetch the complete documentation index at: https://docs.openlayer.com/llms.txt
> Use this file to discover all available pages before exploring further.
# LangGraph
> Learn how to evaluate LangGraph applications with Openlayer
 Openlayer integrates with LangGraph via [Langchain Callbacks](https://python.langchain.com/v0.1/docs/modules/callbacks/). Therfore,
Openlayer automatically traces every run of your
LangGraph applications.
This allows you to set up tests, log, and analyze your LangGraph
application with minimal integration efforts.
Want to integrate with **LangChain**? Check out the [LangChain
integration](/integrations/langchain) page.
## Evaluating LangGraph applications
You can set up Openlayer tests to evaluate your LangGraph applications
in [monitoring](/monitoring/overview) and [development](/development/overview).
### Monitoring
To use the [monitoring mode](/monitoring/overview), you must instrument your code to publish
the requests your AI system receives to the Openlayer platform.
To set it up, you must follow the steps in the code snippet below:
```python Python theme={null}
# 1. Set the environment variables
import os
os.environ["OPENAI_API_KEY"] = "YOUR_OPENAI_API_KEY_HERE"
os.environ["OPENLAYER_API_KEY"] = "YOUR_OPENLAYER_API_KEY_HERE"
os.environ["OPENLAYER_INFERENCE_PIPELINE_ID"] = "YOUR_OPENLAYER_INFERENCE_PIPELINE_ID_HERE"
# 2. Instantiate the `OpenlayerHandler`
from openlayer.lib.integrations import langchain_callback
openlayer_handler = langchain_callback.OpenlayerHandler()
# 3. Use LangGraph's `stream` method to pass the handler to your LLM/chain invocations
from typing import Annotated
from typing_extensions import TypedDict
from langgraph.graph import StateGraph
from langchain_openai import ChatOpenAI
from langchain_core.messages import HumanMessage
from langgraph.graph.message import add_messages
class State(TypedDict):
# Messages have the type "list". The `add_messages` function in the annotation defines how this state key should be updated
# (in this case, it appends messages to the list, rather than overwriting them)
messages: Annotated[list, add_messages]
graph_builder = StateGraph(State)
llm = ChatOpenAI(model = "gpt-4o", temperature = 0.2)
# The chatbot node function takes the current State as input and returns an updated messages list. This is the basic pattern for all LangGraph node functions.
def chatbot(state: State):
return {"messages": [llm.invoke(state["messages"])]}
# Add a "chatbot" node. Nodes represent units of work. They are typically regular python functions.
graph_builder.add_node("chatbot", chatbot)
# Add an entry point. This tells our graph where to start its work each time we run it.
graph_builder.set_entry_point("chatbot")
# Set a finish point. This instructs the graph "any time this node is run, you can exit."
graph_builder.set_finish_point("chatbot")
# To be able to run our graph, call "compile()" on the graph builder. This creates a "CompiledGraph" we can use invoke on our state.
graph = graph_builder.compile()
# Pass the openlayer_handler as a callback to the LangGraph graph. After running the graph,
# you'll be able to see the traces in the Openlayer platform.
for s in graph.stream({"messages": [HumanMessage(content = "What is the meaning of life?")]},
config={"callbacks": [openlayer_handler]}):
print(s)
```
The code snippet above uses builds a simple chatbot. However, the Openlayer
Callback Handler also works for more complex LangGraph applications, including
**multi-agent workflows**. Refer to the final section of the [notebook
example](https://colab.research.google.com/github/openlayer-ai/openlayer-python/blob/main/examples/tracing/langgraph/langgraph_tracing.ipynb)
for a tracing example for multi-agent workflows.
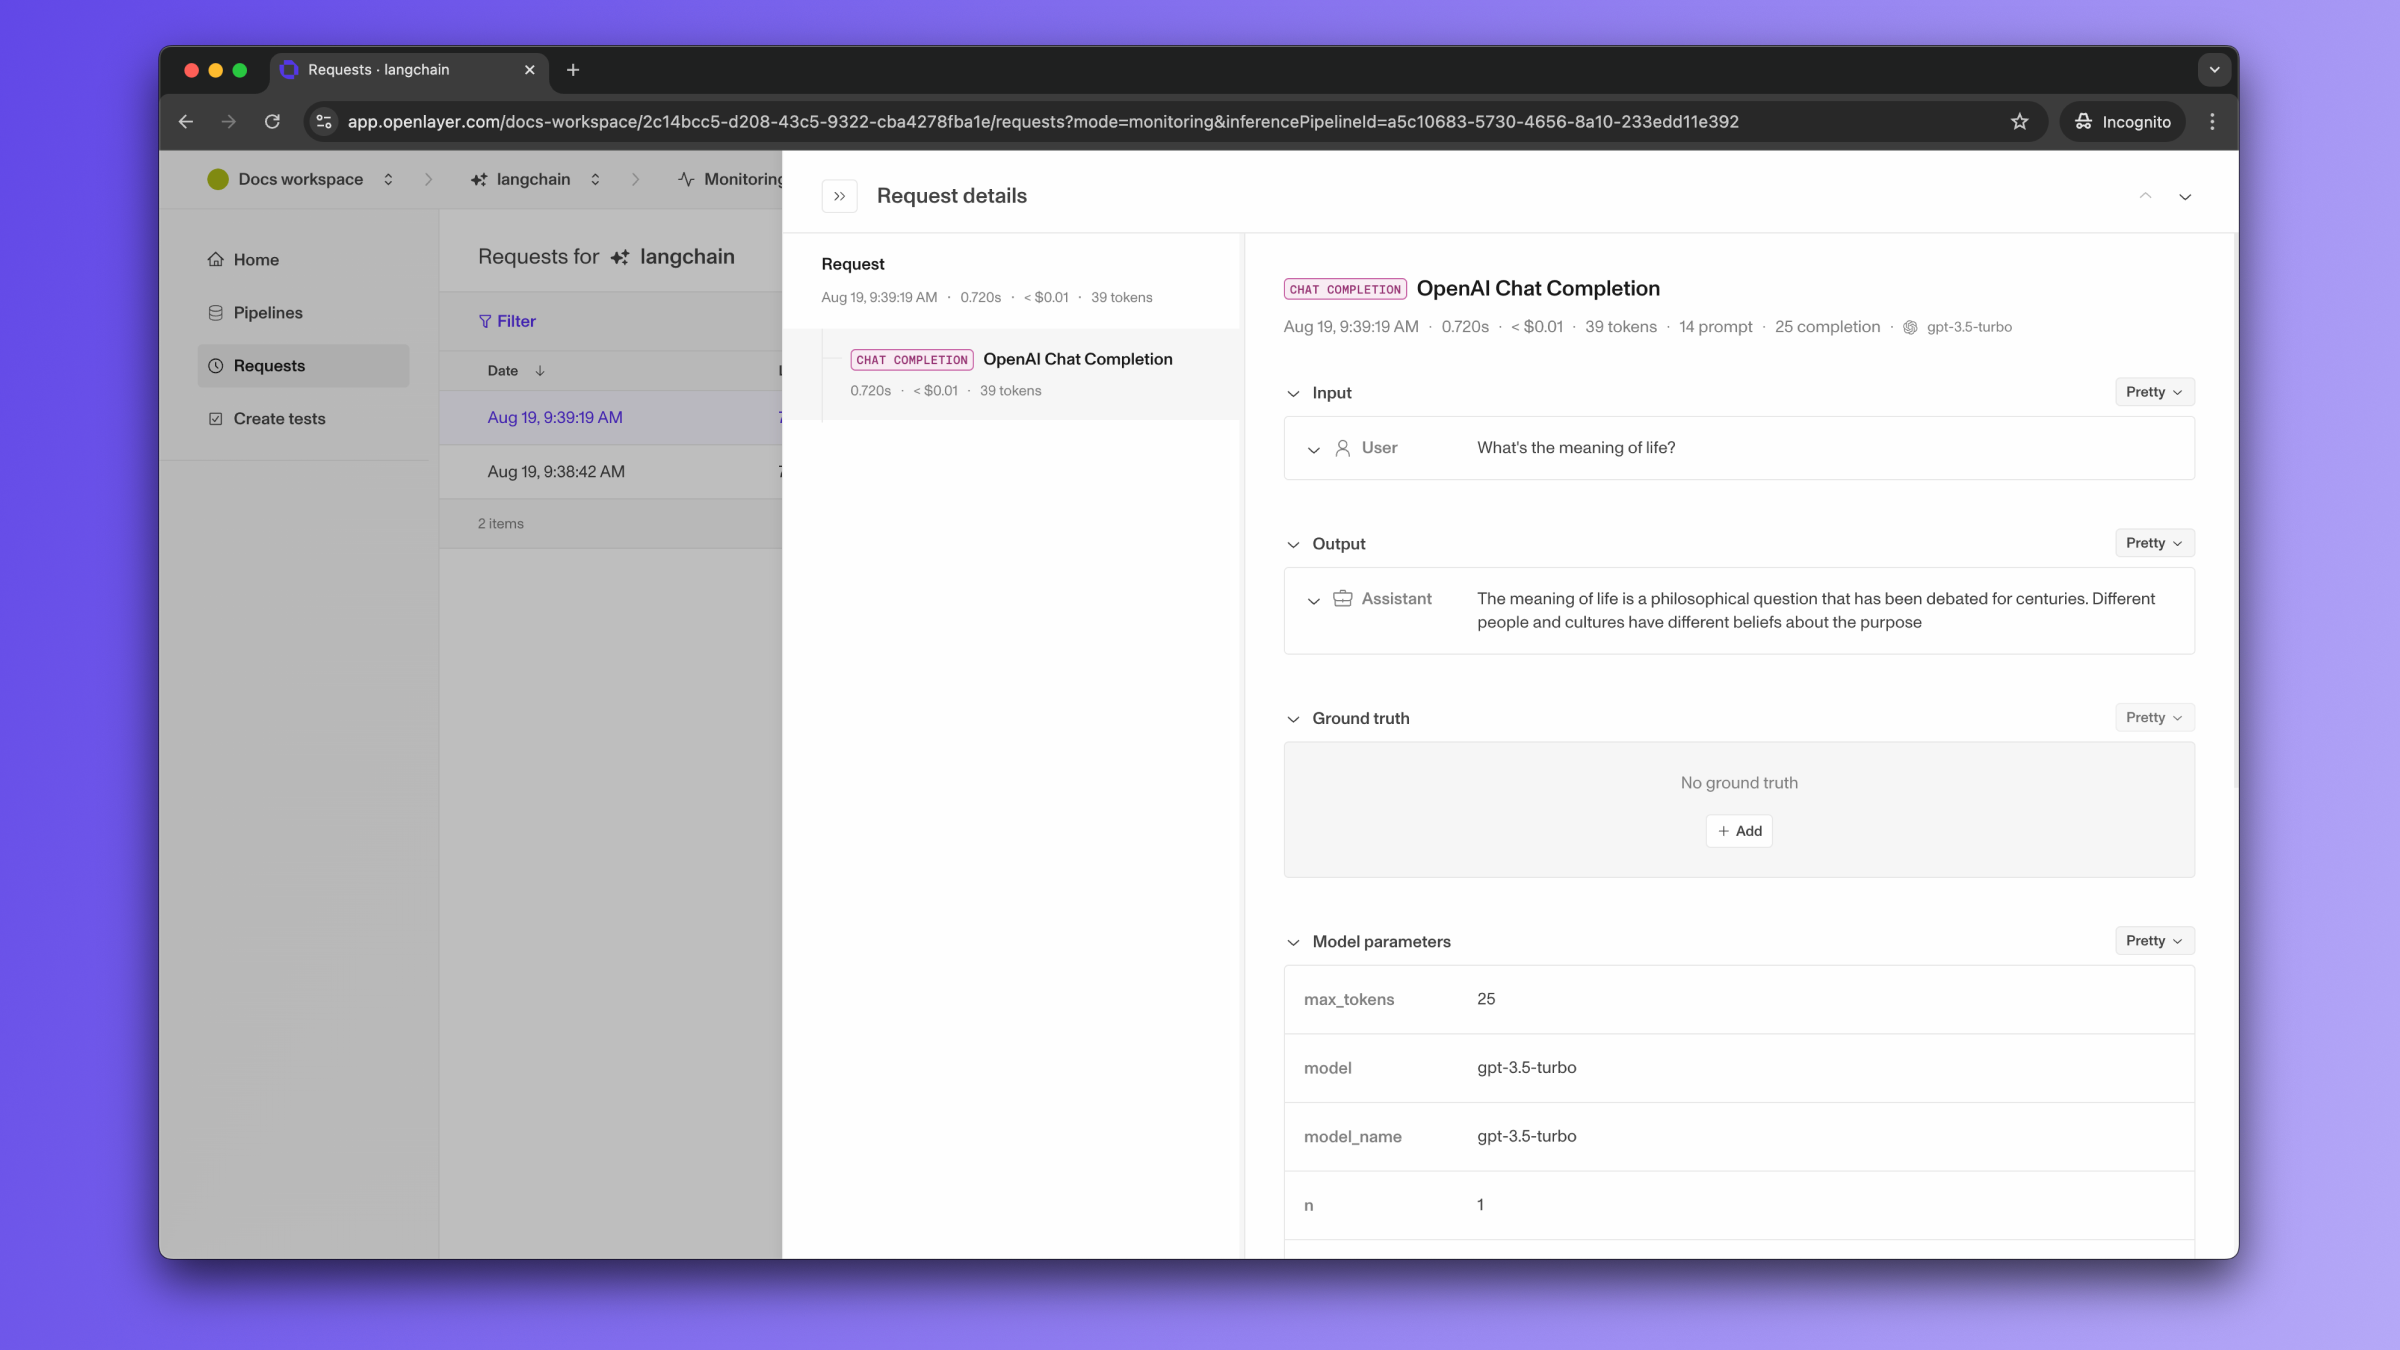
Once the code is instrumented, all your invocations are automatically published to Openlayer,
along with metadata, such as latency, number of tokens, cost estimate, and more.
If you navigate to the "Data" page of your Openlayer data source, you can see
the traces for each request.
Openlayer integrates with LangGraph via [Langchain Callbacks](https://python.langchain.com/v0.1/docs/modules/callbacks/). Therfore,
Openlayer automatically traces every run of your
LangGraph applications.
This allows you to set up tests, log, and analyze your LangGraph
application with minimal integration efforts.
Want to integrate with **LangChain**? Check out the [LangChain
integration](/integrations/langchain) page.
## Evaluating LangGraph applications
You can set up Openlayer tests to evaluate your LangGraph applications
in [monitoring](/monitoring/overview) and [development](/development/overview).
### Monitoring
To use the [monitoring mode](/monitoring/overview), you must instrument your code to publish
the requests your AI system receives to the Openlayer platform.
To set it up, you must follow the steps in the code snippet below:
```python Python theme={null}
# 1. Set the environment variables
import os
os.environ["OPENAI_API_KEY"] = "YOUR_OPENAI_API_KEY_HERE"
os.environ["OPENLAYER_API_KEY"] = "YOUR_OPENLAYER_API_KEY_HERE"
os.environ["OPENLAYER_INFERENCE_PIPELINE_ID"] = "YOUR_OPENLAYER_INFERENCE_PIPELINE_ID_HERE"
# 2. Instantiate the `OpenlayerHandler`
from openlayer.lib.integrations import langchain_callback
openlayer_handler = langchain_callback.OpenlayerHandler()
# 3. Use LangGraph's `stream` method to pass the handler to your LLM/chain invocations
from typing import Annotated
from typing_extensions import TypedDict
from langgraph.graph import StateGraph
from langchain_openai import ChatOpenAI
from langchain_core.messages import HumanMessage
from langgraph.graph.message import add_messages
class State(TypedDict):
# Messages have the type "list". The `add_messages` function in the annotation defines how this state key should be updated
# (in this case, it appends messages to the list, rather than overwriting them)
messages: Annotated[list, add_messages]
graph_builder = StateGraph(State)
llm = ChatOpenAI(model = "gpt-4o", temperature = 0.2)
# The chatbot node function takes the current State as input and returns an updated messages list. This is the basic pattern for all LangGraph node functions.
def chatbot(state: State):
return {"messages": [llm.invoke(state["messages"])]}
# Add a "chatbot" node. Nodes represent units of work. They are typically regular python functions.
graph_builder.add_node("chatbot", chatbot)
# Add an entry point. This tells our graph where to start its work each time we run it.
graph_builder.set_entry_point("chatbot")
# Set a finish point. This instructs the graph "any time this node is run, you can exit."
graph_builder.set_finish_point("chatbot")
# To be able to run our graph, call "compile()" on the graph builder. This creates a "CompiledGraph" we can use invoke on our state.
graph = graph_builder.compile()
# Pass the openlayer_handler as a callback to the LangGraph graph. After running the graph,
# you'll be able to see the traces in the Openlayer platform.
for s in graph.stream({"messages": [HumanMessage(content = "What is the meaning of life?")]},
config={"callbacks": [openlayer_handler]}):
print(s)
```
The code snippet above uses builds a simple chatbot. However, the Openlayer
Callback Handler also works for more complex LangGraph applications, including
**multi-agent workflows**. Refer to the final section of the [notebook
example](https://colab.research.google.com/github/openlayer-ai/openlayer-python/blob/main/examples/tracing/langgraph/langgraph_tracing.ipynb)
for a tracing example for multi-agent workflows.
Once the code is instrumented, all your invocations are automatically published to Openlayer,
along with metadata, such as latency, number of tokens, cost estimate, and more.
If you navigate to the "Data" page of your Openlayer data source, you can see
the traces for each request.
 If the LangGraph graph invocation is just one of the steps of your AI system,
you can use the code snippets above together with
[tracing](/monitoring/tracing). In this case, your graph invocations get added
as steps of a larger trace. Refer to the [Tracing guide](/monitoring/tracing)
for details.
After your AI system requests are continuously published and logged by Openlayer, you can
[create tests](/tests/overview) that run at a regular cadence on top of them.
Refer to the [Monitoring overview](/monitoring/overview), for details on Openlayer's
monitoring mode, to the [Publishing data guide](/monitoring/publishing-data), for more
information on setting it up, or to the [Tracing guide](/monitoring/tracing), to
understand how to trace more complex systems.
### Development
In [development mode](/development/overview), Openlayer becomes a step in
your CI/CD pipeline, and your tests get automatically evaluated after being triggered
by some events.
Openlayer tests often rely on your AI system's outputs on a validation
dataset. As discussed in the
[Configuring output generation guide](/development/configuring-output-generation),
you have two options:
1. either provide a way for Openlayer to run your AI system on your datasets, or
2. before pushing, generate the model outputs yourself and push them alongside your
artifacts.
For LangGraph applications, if you are **not** computing
your system's outputs yourself, you must provide the required **API credentials**.
For example, if you application uses LangChain's [ChatOpenAI](https://python.langchain.com/v0.2/docs/integrations/chat/openai/),
you provide an `OPENAI_API_KEY`, if it uses [ChatMistralAI](https://python.langchain.com/v0.2/docs/integrations/chat/mistralai/),
you must provide a `MISTRAL_API_KEY`,
and so on.
To provide the required API credentials, navigate to "**Workspace settings**" -> "**Environment variables**,"
and add the credentials as secrets.
If fail to add the required credentials, you'll likely encounter a "Missing API key"
error when Openlayer tries to run your AI system to get its outputs.
If the LangGraph graph invocation is just one of the steps of your AI system,
you can use the code snippets above together with
[tracing](/monitoring/tracing). In this case, your graph invocations get added
as steps of a larger trace. Refer to the [Tracing guide](/monitoring/tracing)
for details.
After your AI system requests are continuously published and logged by Openlayer, you can
[create tests](/tests/overview) that run at a regular cadence on top of them.
Refer to the [Monitoring overview](/monitoring/overview), for details on Openlayer's
monitoring mode, to the [Publishing data guide](/monitoring/publishing-data), for more
information on setting it up, or to the [Tracing guide](/monitoring/tracing), to
understand how to trace more complex systems.
### Development
In [development mode](/development/overview), Openlayer becomes a step in
your CI/CD pipeline, and your tests get automatically evaluated after being triggered
by some events.
Openlayer tests often rely on your AI system's outputs on a validation
dataset. As discussed in the
[Configuring output generation guide](/development/configuring-output-generation),
you have two options:
1. either provide a way for Openlayer to run your AI system on your datasets, or
2. before pushing, generate the model outputs yourself and push them alongside your
artifacts.
For LangGraph applications, if you are **not** computing
your system's outputs yourself, you must provide the required **API credentials**.
For example, if you application uses LangChain's [ChatOpenAI](https://python.langchain.com/v0.2/docs/integrations/chat/openai/),
you provide an `OPENAI_API_KEY`, if it uses [ChatMistralAI](https://python.langchain.com/v0.2/docs/integrations/chat/mistralai/),
you must provide a `MISTRAL_API_KEY`,
and so on.
To provide the required API credentials, navigate to "**Workspace settings**" -> "**Environment variables**,"
and add the credentials as secrets.
If fail to add the required credentials, you'll likely encounter a "Missing API key"
error when Openlayer tries to run your AI system to get its outputs.