Connecting to the Openlayer platform
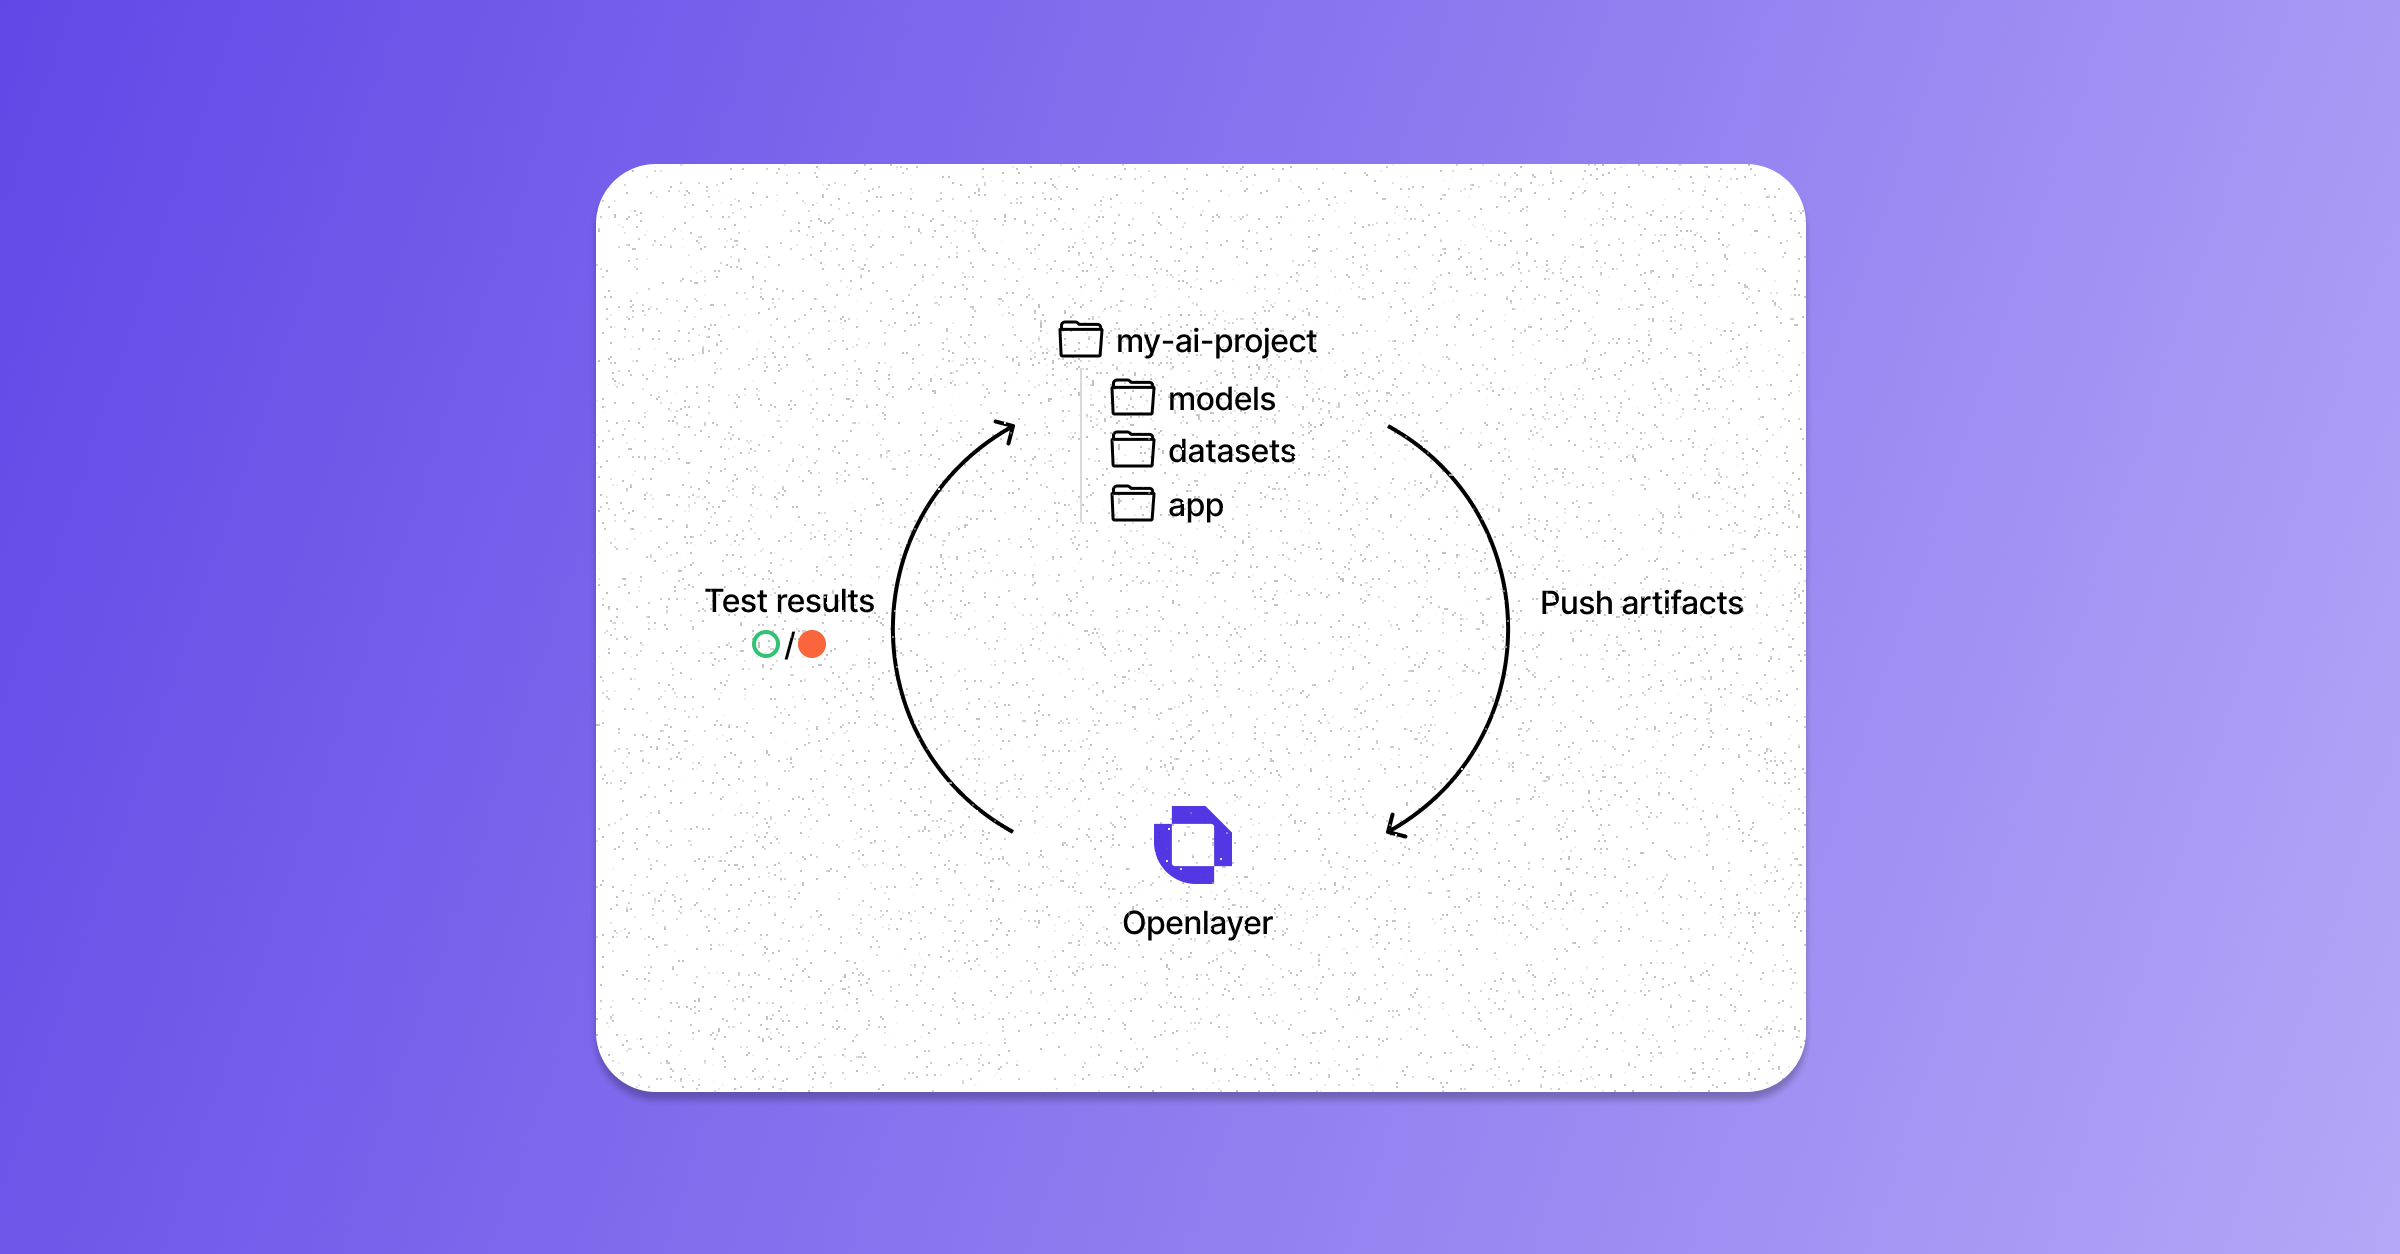
To make Openlayer part of your pipeline, you must set up a way to push your artifacts to the Openlayer platform after each development cycle. You can do this in three different ways: Regardless of the path, you’ll need to prepare some files that Openlayer uses to understand your system and evaluate your tests. Namely, anopenlayer.json
and configurations related to how your model runs. We’ll cover both in detail in
separate guides (openlayer.json
and Configure output generations, respectively).
For now, let’s take a high-level look at each path available.
Git
The most common way to set up pushes to Openlayer is via Git repositories. In this case, Openlayer works as a step in your CI/CD pipeline. Every commit you push to a Git repo connected to your project also gets pushed to the Openlayer platform and triggers the evaluation of your tests. Setting up a Git integration begins by connecting a Git repo to an Openlayer project. To see how to do this, refer to the Project creation guide. You can also refer to the Template gallery for more examples.Openlayer CLI
The Openlayer CLI allows you to push artifacts to your Openlayer project directly from the Command Line Interface (CLI). You can use this path regardless of whether your project is connected to a Git repository or not. You can use the Openlayer CLI to create custom CI/CD workflows and integrate into your existing pipelines. Refer to the Push and poll using the Openlayer CLI guide and to the Openlayer CLI documentation for details.Openlayer REST API
The Openlayer REST API is used to push your artifacts to Openlayer by making an HTTPSPOST request to the relevant endpoints.
Refer to the Push and poll using the Openlayer REST API guide and
to the REST API reference for details.
Commit logs
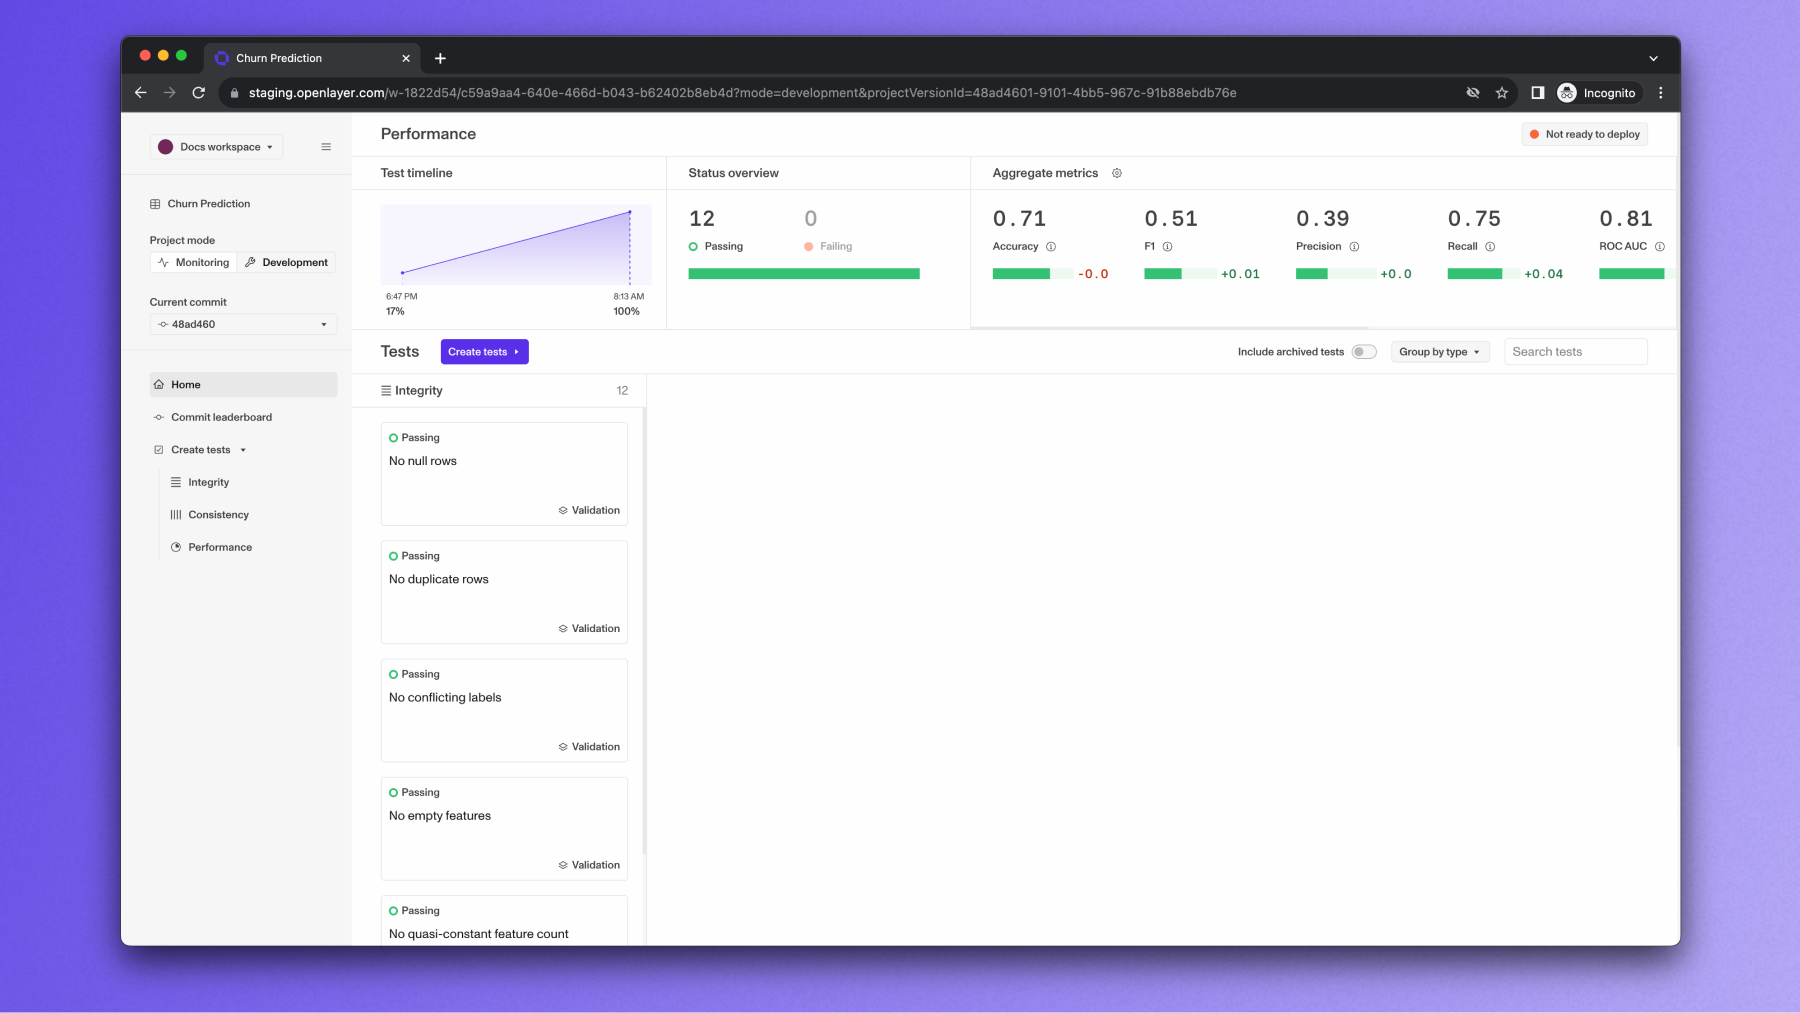
Once you push a commit to your Openlayer project, the platform goes through a series of processing steps, the final one being the evaluation of your tests. Depending on the information provided when you push, Openlayer might set up an environment to run your model, iterate through your datasets to get the model predictions, and generate insights to evaluate your tests. The commit logs show a detailed overview of all these steps. You can use them to understand what’s going on and if there are any issues with the artifacts you pushed.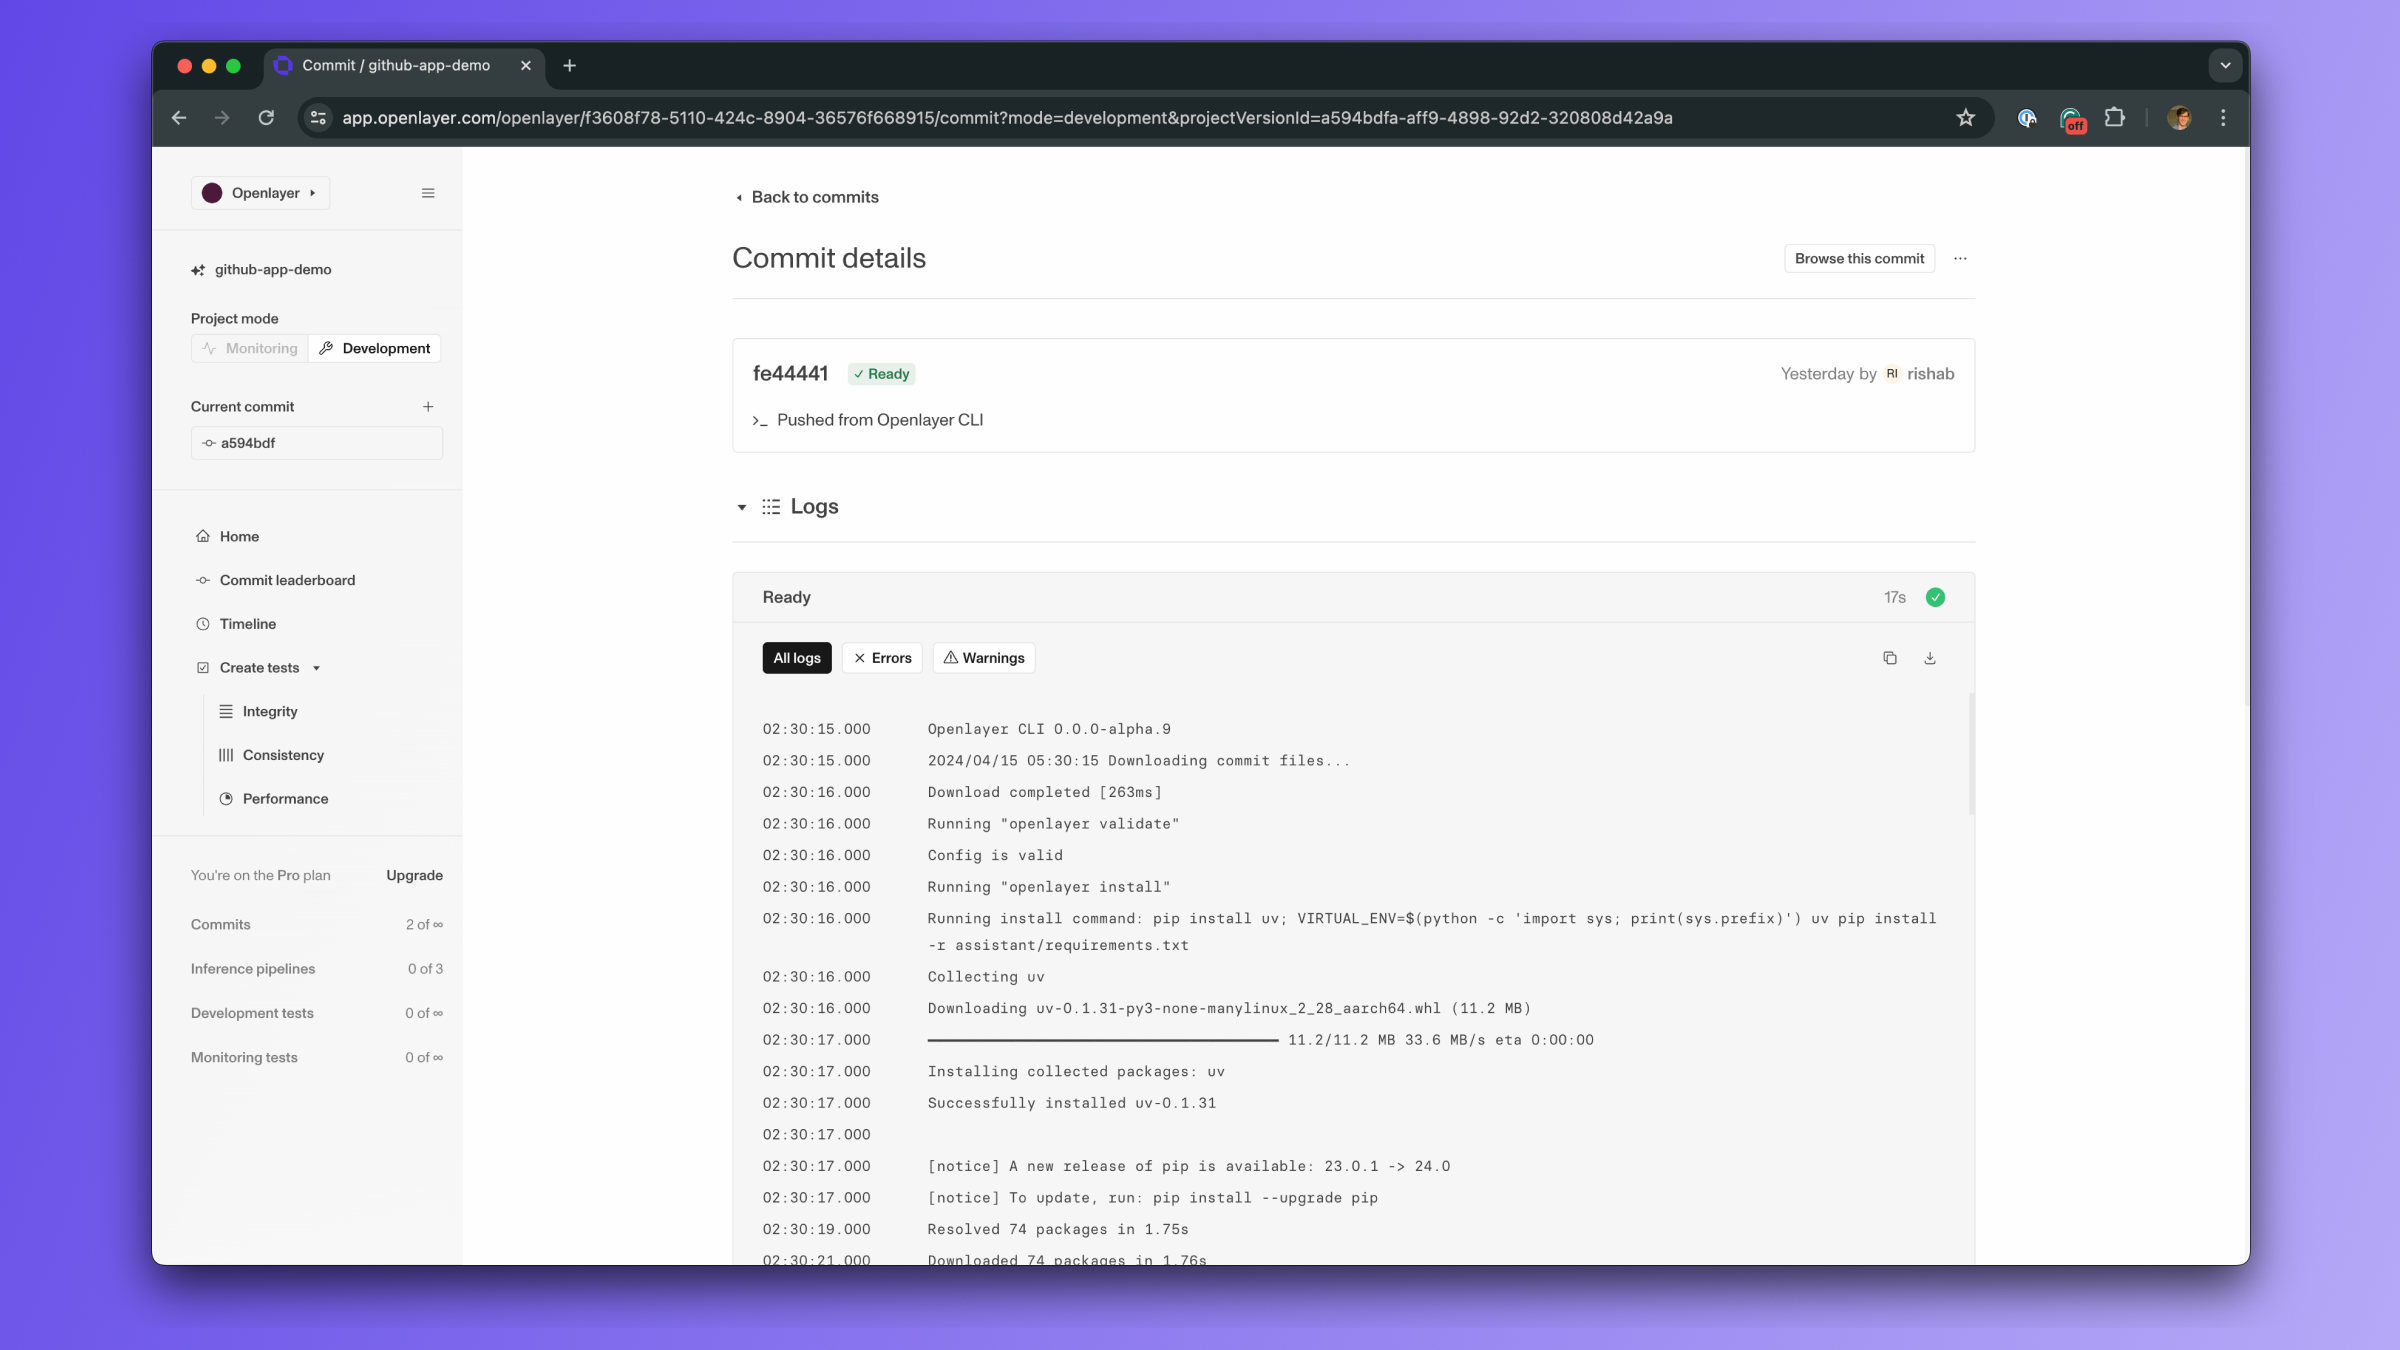
- Test results on the platform
- Test results on Git