To follow this guide, feel free to use one of the template projects from the Template gallery.
We use the OpenAI in Python as an example.
Directory structure
Before you start, make sure that the directory you want to push to Openlayer adheres to one of the options below.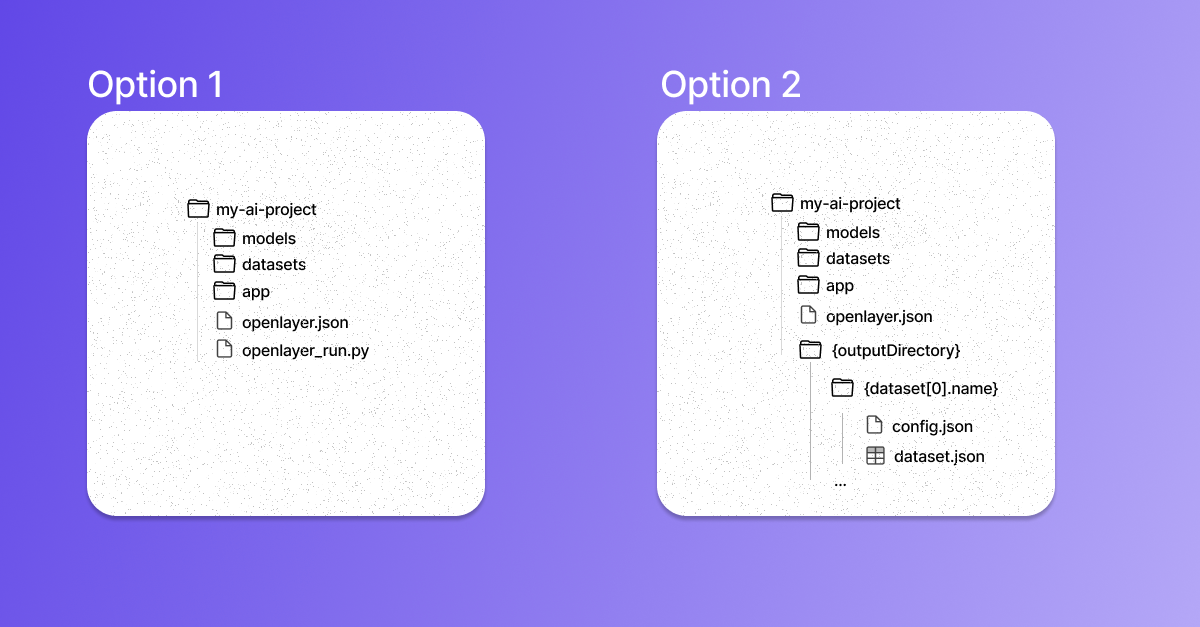
openlayer.json, there is a run script (openlayer_run.py).
This option represents the scenario where Openlayer will use your script to get your model
outputs for your datasets.
On the other hand, option 2 illustrates the situation when
you already provide your model’s outputs for your datasets. Refer to the Configuring
output generation page for details.
Option 1 is more common. However, option 2 is suitable for users who don’t
want to give Openlayer access to their source code and for users whose
execution runtime is not supported by Openlayer.
Pushing to Openlayer
To push the directory to Openlayer, you must:Login to Openlayer using the CLI
Inside your directory, run the command:This will prompt you for the Openlayer API URL (which should be kept as Refer to the login command reference for more information.
https://api.openlayer.com
if you are using app.openlayer.com) and for your API key (which you can find here).Link to an Openlayer project
Then, run the command:You must answer a few questions, such as whether to create a new project on Openlayer,
the project directory, and others.Refer to the link command reference for more information.
Push to the Openlayer project
Finally, run:This command creates and pushes a new commit to your Openlayer project. It then waits
for the evaluation of your tests to display the results:Refer to the push command reference for more information.
Poll the results
After following the steps above, you should see a new commit in your Openlayer project. You can view the test results using theopenlayer inspect CLI command:
failed), you can check the logs on the Openlayer platform to debug the issue.
Refer to the inspect command reference for more information.